When you need to remove markup from a photo, the strokes are usually part of the image file—not a layer you can toggle off. This guide walks through cleanup on a desktop so you can reuse the picture.

  1. 1️⃣ Download Photo Stamp Remover.
  2. 2️⃣ Open the image.
  3. 3️⃣ Select the markup area.
  4. 4️⃣ Click Remove.
  5. 5️⃣ Save the clean result.
Photo Stamp Remover Screenshot.
Eugene - CEO at SoftOrbits, Candidate of Technical Sciences, has more than 16 years of expertise in software development, photo and multimedia applications, enhancing and transforming digital images and videos.
📅 Last updated on:  2026-04-13

Someone sends a screenshot with red scribbles all over it. Or a photo with a thick black marker crossing out a face. Or an annotated image where the arrows and text boxes need to go before the picture can be reused. The markup is baked into the pixel data now, not a separate layer. You cannot undo it in the sender's app.
A markup remover reads the pixels around the drawing, infers what was behind it, and fills the gap. Photo Stamp Remover does this on Windows with several removal algorithms, from fast inpainting to slower AI generation that reconstructs complex backgrounds like faces and text.

Remove Markup from a Photo with Photo Stamp Remover

Step by step

Download and install

Grab the installer from the Photo Stamp Remover page. It runs on Windows 7 through 11.

Open the image

Use Files / Add or drag the photo or screenshot into the program window. Multiple files are accepted for batch work.

Markup Remover Screenshot: Add Images..

Select the markup

Pick a selection tool that fits the shape. Marker is the quickest: paint over the scribble or drawing with a few strokes. For straight arrows or rectangles, use Rectangular Selection. Color Selection grabs all pixels of one color at once, which is handy when the markup is a single bright color (red pen, yellow highlighter) on a photo background.

Markup Remover Screenshot: Select the drawing with a marker...

Pick a removal method (optional)

The default Inpainting is fast and works for most screenshots and photos with simple backgrounds. If the markup covers a face, printed text, or a complex pattern, switch to AI Generation. It takes longer (up to about a minute) but reconstructs the hidden area more accurately.

Markup Remover Screenshot: object removal options..

Click Remove

The program fills the selected area. For inpainting, the result appears in seconds.

Markup Remover Screenshot: The result..

Photo Stamp Remover Photo Stamp Remover

Remove unwanted watermarks, text, and logos from all types of images with free SoftOrbits Watermark Remover.

Clean Up Leftovers with the Clone Stamp

Inpainting handles most cases cleanly. On complex backgrounds (repeating patterns, skin texture, small text), some traces may remain. The Clone Stamp Tool fixes those:
Remove markup from Screenshot: Using Clone tool...

  • Hold Alt and click a clean area near the leftover to set the source point.
  • Paint over the leftover. Pixels from the source point fill in as you draw.
  • Repeat for other spots until the result looks natural.

Can You Remove Markup from a Photo Sent to You?

This is the most common scenario. Someone annotated a photo on their phone and sent it through Messages, WhatsApp, or email. The markup is burned into the pixels. There is no undo on your side.
Desktop markup remover software can still clean it up. The app does not care who drew the markup or which tool created it. It works at the pixel level: analyze the surrounding area, reconstruct what was behind the drawing, replace the marked pixels.
There are limits. If a thick black marker covers an entire face, AI generation will attempt to fill the gap, but the output is a plausible reconstruction, not recovery of the original hidden pixels. Thin scribbles, arrows, text boxes, and highlights over busy photo backgrounds usually come off with little trace.

Remove Black Marker and Colored Scribbles from Screenshots

Screenshots are often the easiest case when you remove markup from a screenshot. Backgrounds are typically flat UI colors, solid gradients, or repeating patterns. The drawing is usually a bright color (red circles, yellow highlights, black marker strokes).

Steps:

  • Open the screenshot in Photo Stamp Remover.
  • Use Color Selection to grab all the red or black pixels at once if the scribble is one color.
  • Click Remove. Inpainting fills the flat background almost seamlessly.

For black marker over text, the program reconstructs the text using surrounding letterforms and spacing. Results are best when the marker does not cover more than about half of each character.

Phone Method: Reduce Markup Visibility in iOS / Android Photos App

The built-in Photos app on iPhone (and the equivalent on Android) can sometimes reduce markup visibility. This works only for light annotations, not for thick opaque drawings.
Remove markup from Screenshot: Using iPhone Photos App. Before and After..

Quick phone method

Open the photo in the Photos app.
Tap Edit.
Try the eraser in the Markup tool: it removes strokes made in the same app, on the same device, if the photo was not yet flattened or exported.
If the eraser does not work (markup was baked in), lower Brightness and raise Exposure to fade the drawing into the background.
Save.

This method leaves visible artifacts on most photos. The brightness trick only partially hides the markup; it does not remove it. For a clean result, desktop software with inpainting or AI fill is the more reliable option.

Photo Stamp Remover Photo Stamp Remover
Markup remover for Windows: remove markup from a photo or screenshot—drawings, scribbles, arrows, and black marker—with inpainting or AI fill in Photo Stamp Remover.

Remove unwanted watermarks, text, and logos from all types of images.

Photo Stamp Remover Screenshot.


🙋Frequently Asked Questions

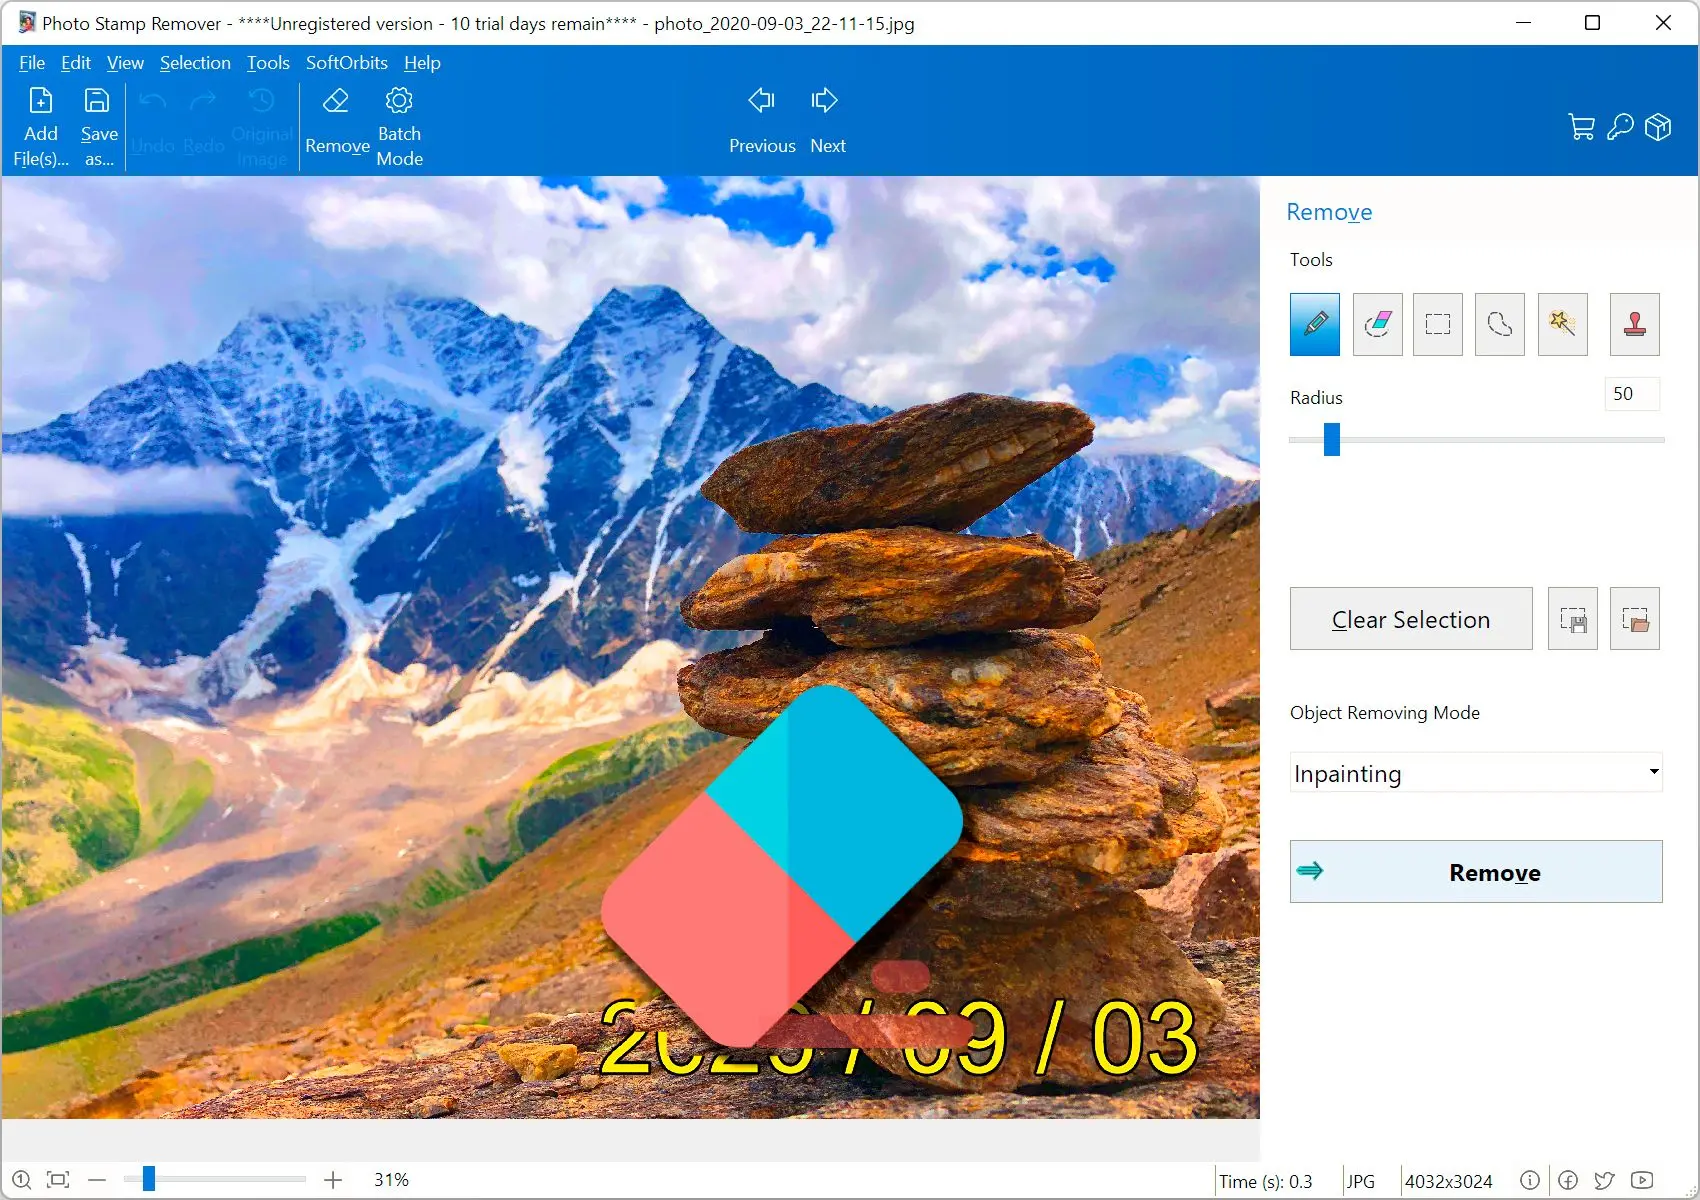
Open the photo in Photo Stamp Remover, paint over the markup with the Marker selection tool, and click Remove. The inpainting engine fills in the area. This works regardless of which app or device was used to add the markup.

Yes. Photo Stamp Remover handles screenshots well because their flat, uniform backgrounds are easy for the inpainting algorithm to reconstruct. Red circles, arrows, text boxes, and yellow highlights usually come off cleanly.

Use Color Selection to select all the black marker pixels at once, then click Remove. On a screenshot with a flat background, the result is usually seamless. Over text, the program reconstructs the letters from context.

Same process: select the red pixels (Color Selection picks them up in one click), then Remove. Red contrasts with most screenshot backgrounds, so the selection stays precise and the inpainting looks clean.

Thin drawings, arrows, and highlights over varied photo backgrounds are removed with little or no trace. Thick opaque marker that covers large areas (for example a fully blacked-out face) can be filled with an AI-generated reconstruction, but the hidden original pixels are not recovered; you get a plausible fill.

Open the image in Photo Stamp Remover, select the drawing with Marker or Color Selection, and click Remove. Match the tool to the shape and color of the markup, then refine with the Clone Stamp if anything remains.

Open the scribbled image in Photo Stamp Remover, select the scribble with the Marker or Color Selection tool, and click Remove. For simple backgrounds, inpainting is enough. For faces or text behind the scribble, switch to AI Generation mode.

Photo Stamp Remover includes an AI Generation removal mode that reconstructs complex backgrounds (faces, patterns, text) behind the markup. For simpler cases, the faster Inpainting mode is sufficient and does not rely on AI.

A free trial is available. It covers the full workflow so you can test removal on your specific photo. The paid license removes trial limits.