2. FotoSketcher: best free desktop option, no watermark
FotoSketcher is a long-running free Windows pencil sketch converter with around twenty drawing and painting styles, including pencil-sketch looks that read as line art. The official
FotoSketcher site states it is 100% free, even for commercial use, and the build adds no watermark, which is rare for a desktop tool. You get sliders for edge strength and contrast, so it bends further than a fixed online filter.
Pros:
Converts photos free, with no watermark
Adjusts edges and contrast with sliders
Cons:
Leans painterly, so clean outlines take fiddling
Lacks a real batch workflow and runs on Windows only
Verdict: The first thing to try if you want a free desktop tool and do not mind an older interface.
Our take: We ran a few portraits through the free build; the pencil presets are good, but getting a crisp single-line look meant pushing the sliders harder than expected.
3. AKVIS Draw: best for pencil hatching and Photoshop users
AKVIS Draw converts photos into pencil-style line drawings and runs both standalone and as a plugin for Photoshop and other editors, per the
AKVIS Draw page. It is paid, with home and business tiers, and supports batch processing in the higher plans. The hatching looks hand-drawn, which is its main draw.
Pros:
Renders natural, hand-drawn hatching
Works as a Photoshop plugin or standalone
Cons:
Costs money, split into home and business tiers
Leans to sketch styles, less suited to flat technical outlines
Requires a host editor for the plugin route
Verdict: A solid pick if you live in Photoshop and want artistic pencil lines.
Our take: We judged AKVIS from its documentation and long review history rather than a paid license; the hatching reputation is well earned, but confirm the current tier and price on the vendor site before buying.
4. Clip Studio Paint EX: best for people who also draw by hand
Clip Studio Paint is artist software, and the EX tier includes an LT (line and tone) conversion that extracts lines and screentones from a photo, handy for comics and manga. It is overkill if all you want is a quick outline, and the EX features sit behind the top tier.
Pros:
Extracts lines and tone with LT conversion (EX tier)
Includes a full drawing toolset for hand cleanup
Runs on Windows, Mac, and tablets
Cons:
Locks LT extraction behind the pricey EX tier
Demands a steep learning curve for one conversion
Costs a subscription or a large one-time fee
Verdict: Worth it only if you already draw and want line extraction inside a real art program.
Our take: This take comes from Clip Studio's published feature list, not a bought EX license. For a one-off line drawing it is the wrong tool; for an illustrator it is a different conversation.
5. VanceAI VansPortrait: best for fast AI portraits in the browser
VansPortrait is an online AI tool that turns a photo into a line drawing or sketch in a few seconds, aimed at faces. It is freemium, with a handful of free conversions before paid credits kick in. Because it is generative, it can flatter a portrait, but it also reworks detail rather than tracing it.
Pros:
Converts in a few seconds with no install
Flatters portraits with its AI styles
Offers a free tier to test
Cons:
Uploads your photo to its servers
Caps free conversions each month
Hands you little control over the look
Verdict: Good for a quick portrait when privacy and batch do not matter.
Our take: The free tier is enough to see if you like the style. On group photos and busy backgrounds it gets confident in ways the original photo never was.
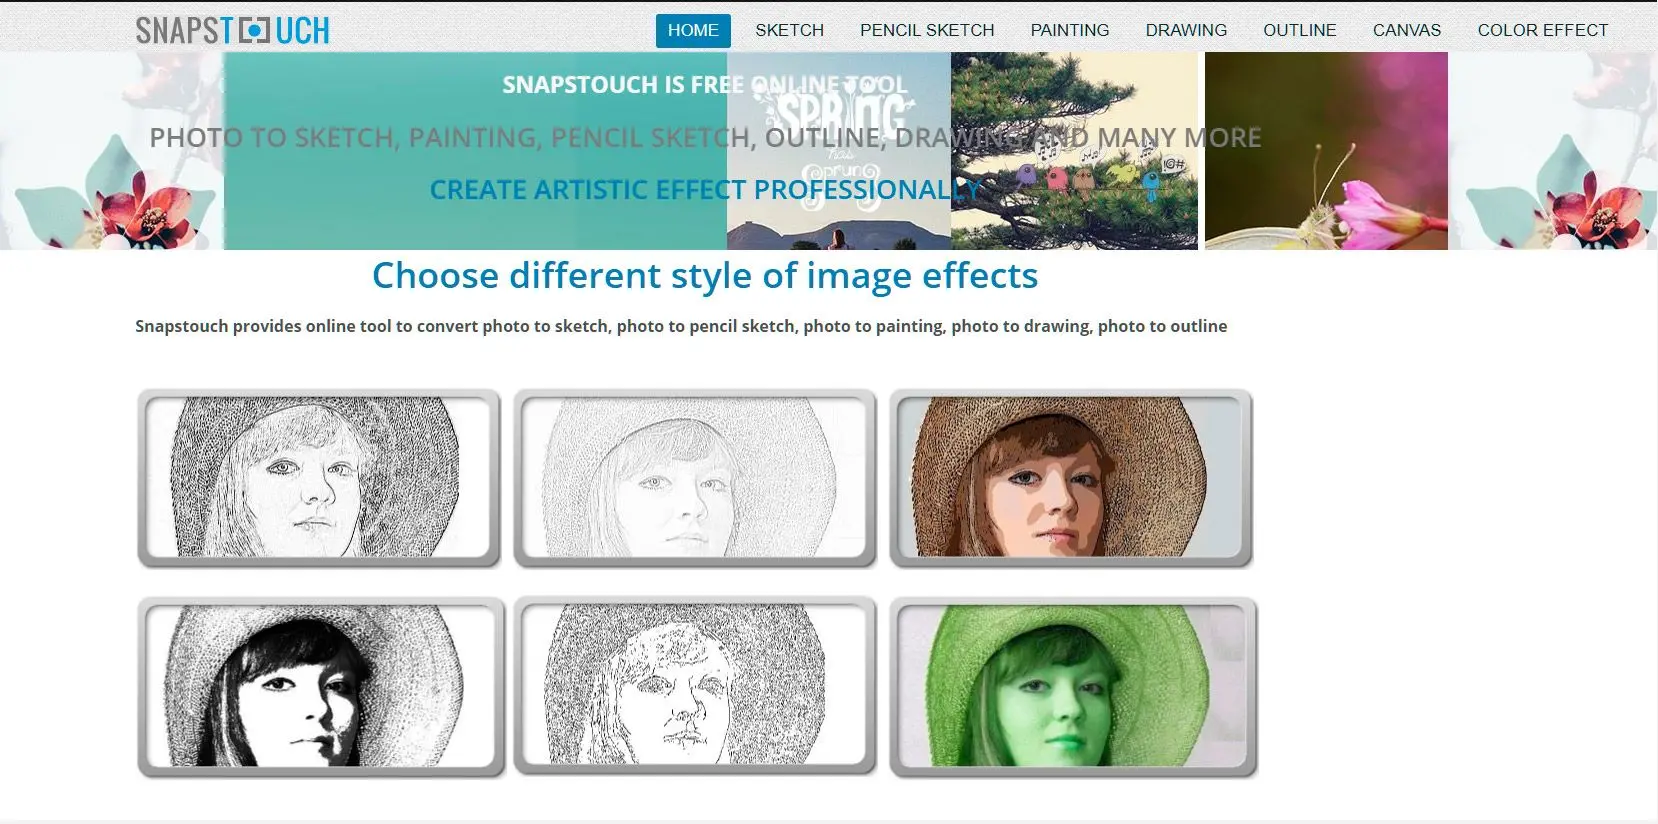
6. Snapstouch: best free online converter, no sign-up
Snapstouch is a free browser tool with sketch and outline effects and no account required. It is the fastest way to test the idea, with the usual online caveats, namely a file-size limit and one image at a time.
Pros:
Runs free with no sign-up
Offers several line and sketch effects
Cons:
Requires an upload, so skip sensitive photos
Caps file size and does one image at a time
Gives little fine control
Verdict: Fine for a one-off, casual outline when you just want to see the effect.
Our take: It does what it says in about a minute. We would not push a personal family photo through an unknown server, which is the recurring theme with free online tools.
7. BeFunky: best when you already use a design suite
BeFunky bundles a photo-to-sketch effect inside a broader online design and editing suite. The sketch effect that matters sits in the paid Plus tier, so it makes sense mainly if you already pay for the suite for other work.
Pros:
Sits inside a full design toolkit
Works in the browser and on mobile
Produces consistent, polished output
Cons:
Gates the sketch effect behind paid Plus
Uploads everything to the cloud
Overshoots if line drawing is all you need
Verdict: Reasonable if BeFunky is already your editor; not worth subscribing to just for this.
Our take: We tried the free editor; the genuinely useful sketch controls are gated behind Plus, so the "free" path stops short fast.
8. Adobe Firefly: best for generative line art from a prompt
Firefly is Adobe's generative AI. Its
line-art generator can produce line drawings from a text prompt or a reference image, with a few free credits before you need a paid plan. It generates rather than converts, so it is closer to illustration than tracing your exact photo.
Pros:
Generates clean line styles from a prompt
Integrates with Creative Cloud
Includes a few free credits to start
Cons:
Reinterprets rather than converts your photo
Charges credits after the free tier
Requires the cloud and an account
Verdict: Pick it when you want line art inspired by a photo, not a faithful copy of it.
Our take: We ran the free credits; for a stylized result it is impressive, but if you need your actual subject reproduced line for line, it is the wrong category.
9. Clip2Comic: best line styles on iPhone
Clip2Comic is an iOS app with comic and sketch styles, several of them free, and tie-ins to printing. The free version watermarks output, and premium removes it, the standard mobile trade.
Pros:
Offers many styles, several of them free
Prints and shares from the app
Cons:
Watermarks the free output
Cramps control on a small screen
Verdict: Handy if you live on an iPhone and want a quick comic or line look.
Our take: We tried the free styles; fine for social posts, but the watermark and small canvas rule it out for anything you want to print clean.
10. Prisma: best artistic filters on the go
Prisma is a well-known mobile app for artistic, painterly filters, with sketch-style looks among hundreds of presets. It is built for stylized art, not precise outlines, so treat the line styles as one option among many.
Pros:
Packs hundreds of art styles
Exports fast and social-ready
Cons:
Uses style transfer, not faithful line extraction
Locks HD export and most styles behind a subscription
Processes everything in the cloud
Verdict: Good for an artistic phone effect, not for technical or cutting-ready lines.
Our take: We used the free tier. It is fun, though the output is an interpretation and the strongest styles need the subscription.
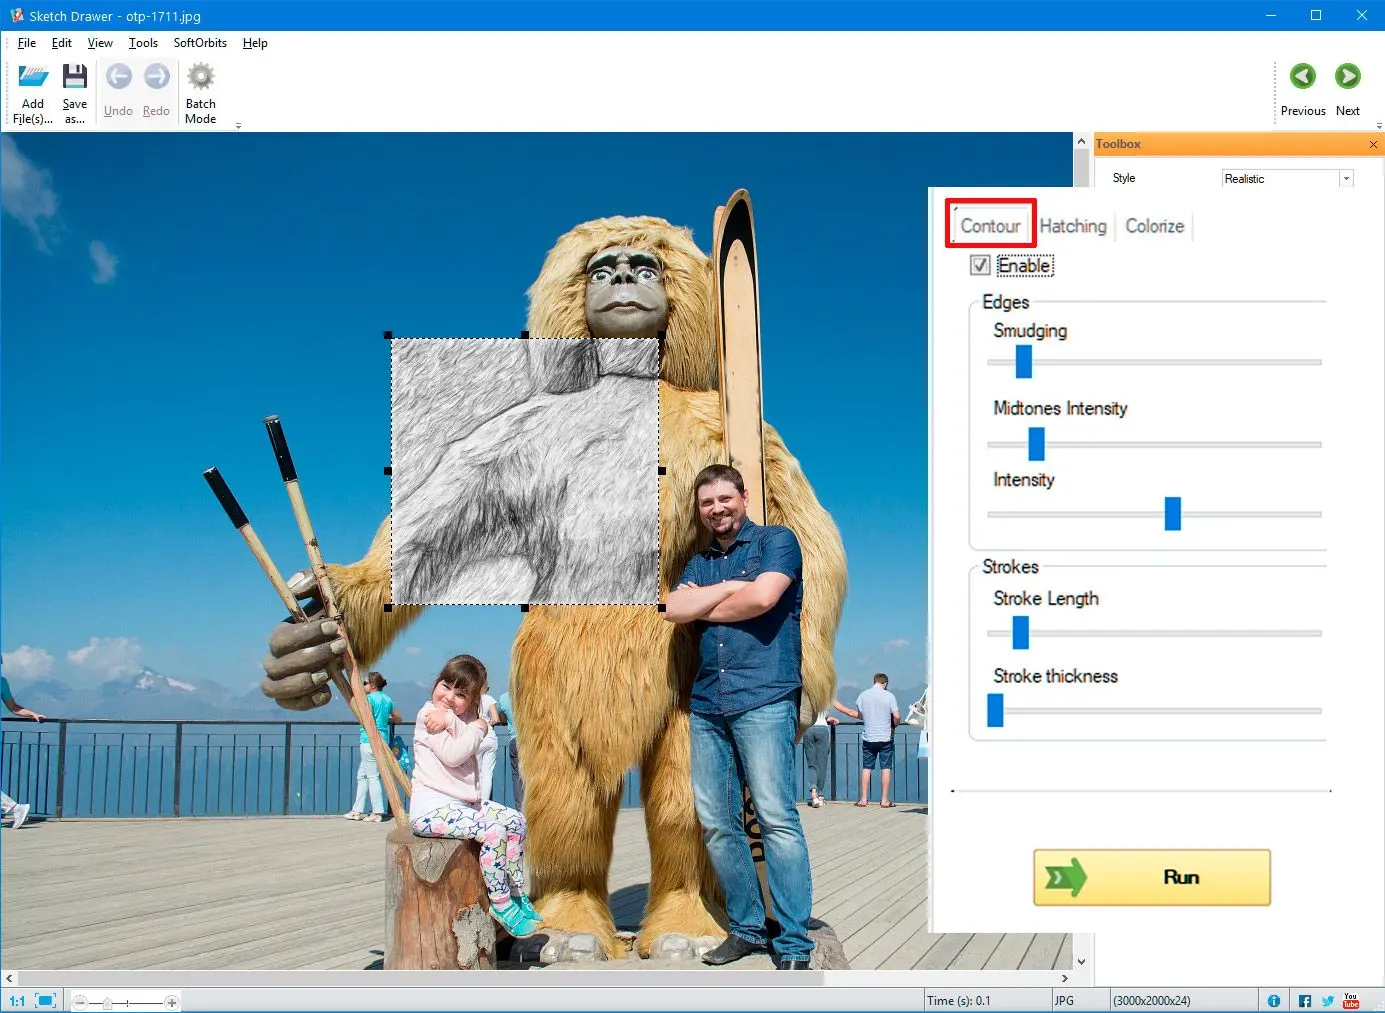


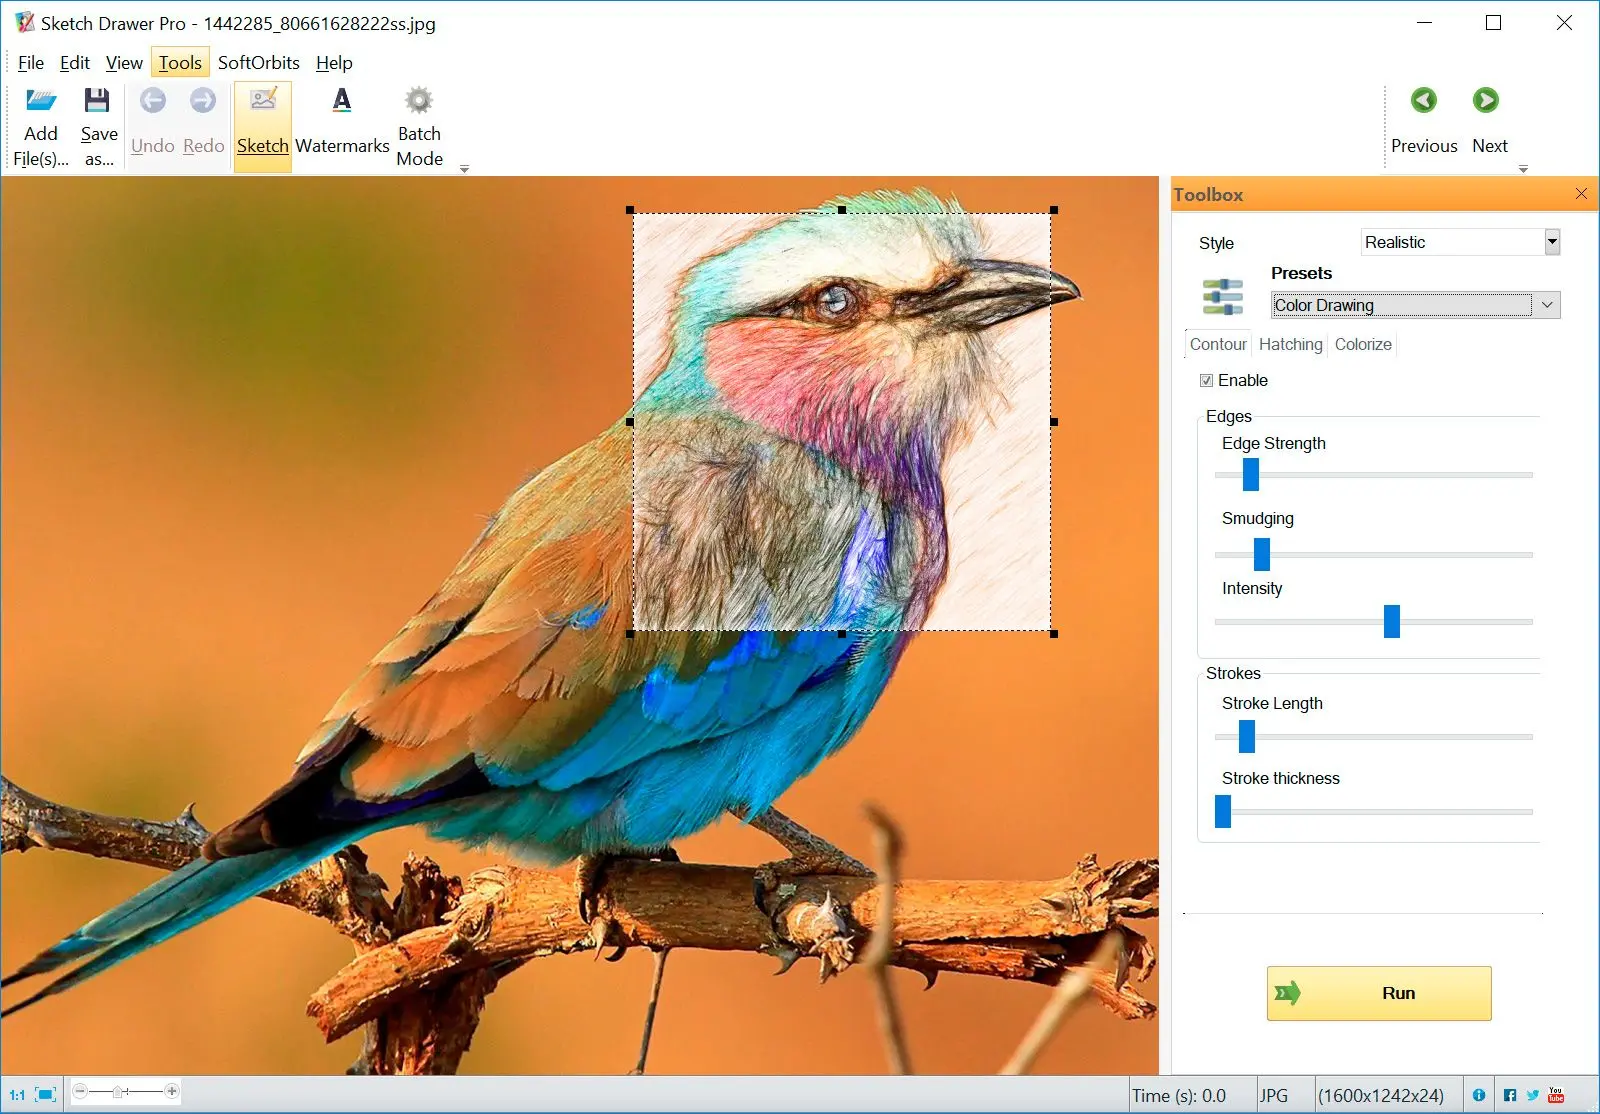
 Sketch Drawer