Sketch Drawer: Your Photo to Pencil Sketch Converter Software
Looking to transform your photos into artistic pencil sketches? Sketch Drawer makes turning photos into sketches easy. But first, let's see if it's good for you by checking its pros and cons.
👍 Strengths of Sketch Drawer:- Simple and intuitive interface: Sketch Drawer boasts a user-friendly design, making it easy for anyone to navigate and convert photos, even with limited editing experience.
- Variety of presets and customization options: Experiment with different sketch styles! Sketch Drawer has lots of shortcut looks for pictures (presets) and lets you change small things (like line thickness) for your own style.
- Batch processing: Need to convert a collection of photos? Sketch Drawer can turn many pictures into sketches at once, saving you time!
- Free trial available: Unsure if Sketch Drawer is right for you? Take advantage of the free trial to test its features before committing.
🤔 Things to Consider:
- Limited editing capabilities: Sketch Drawer primarily focuses on photo-to-sketch conversion.
- Potentially limited control for advanced users: While Sketch Drawer offers customization options, it may not provide the granular control desired by experienced users who prefer in-depth editing capabilities.
- Paid software with free trial: While a free trial is available, Sketch Drawer is ultimately paid software.
🌟 Sketch Drawer is a Great Choice for:
- Casual users and beginners: The user-friendly interface and variety of presets make Sketch Drawer ideal for those new to photo editing or sketch creation.
- Those who need to convert multiple photos: The batch processing function allows for efficient conversion of a collection of images.
- Users who want a quick and easy solution: Sketch Drawer offers a straightforward approach to photo-to-sketch conversion, saving you time and effort.
However, if you:
- Need advanced photo editing features: For in-depth editing capabilities, you might consider exploring professional photo editing software.
- Are an experienced user seeking ultimate control: The customization options in Sketch Drawer might not be sufficient for your advanced editing needs.
- Prefer a completely free solution: There are online tools and mobile apps that offer free photo-to-sketch conversion, though features and quality may vary.
So, unleash your inner artist and explore the world of photo-to-sketch with Sketch Drawer!
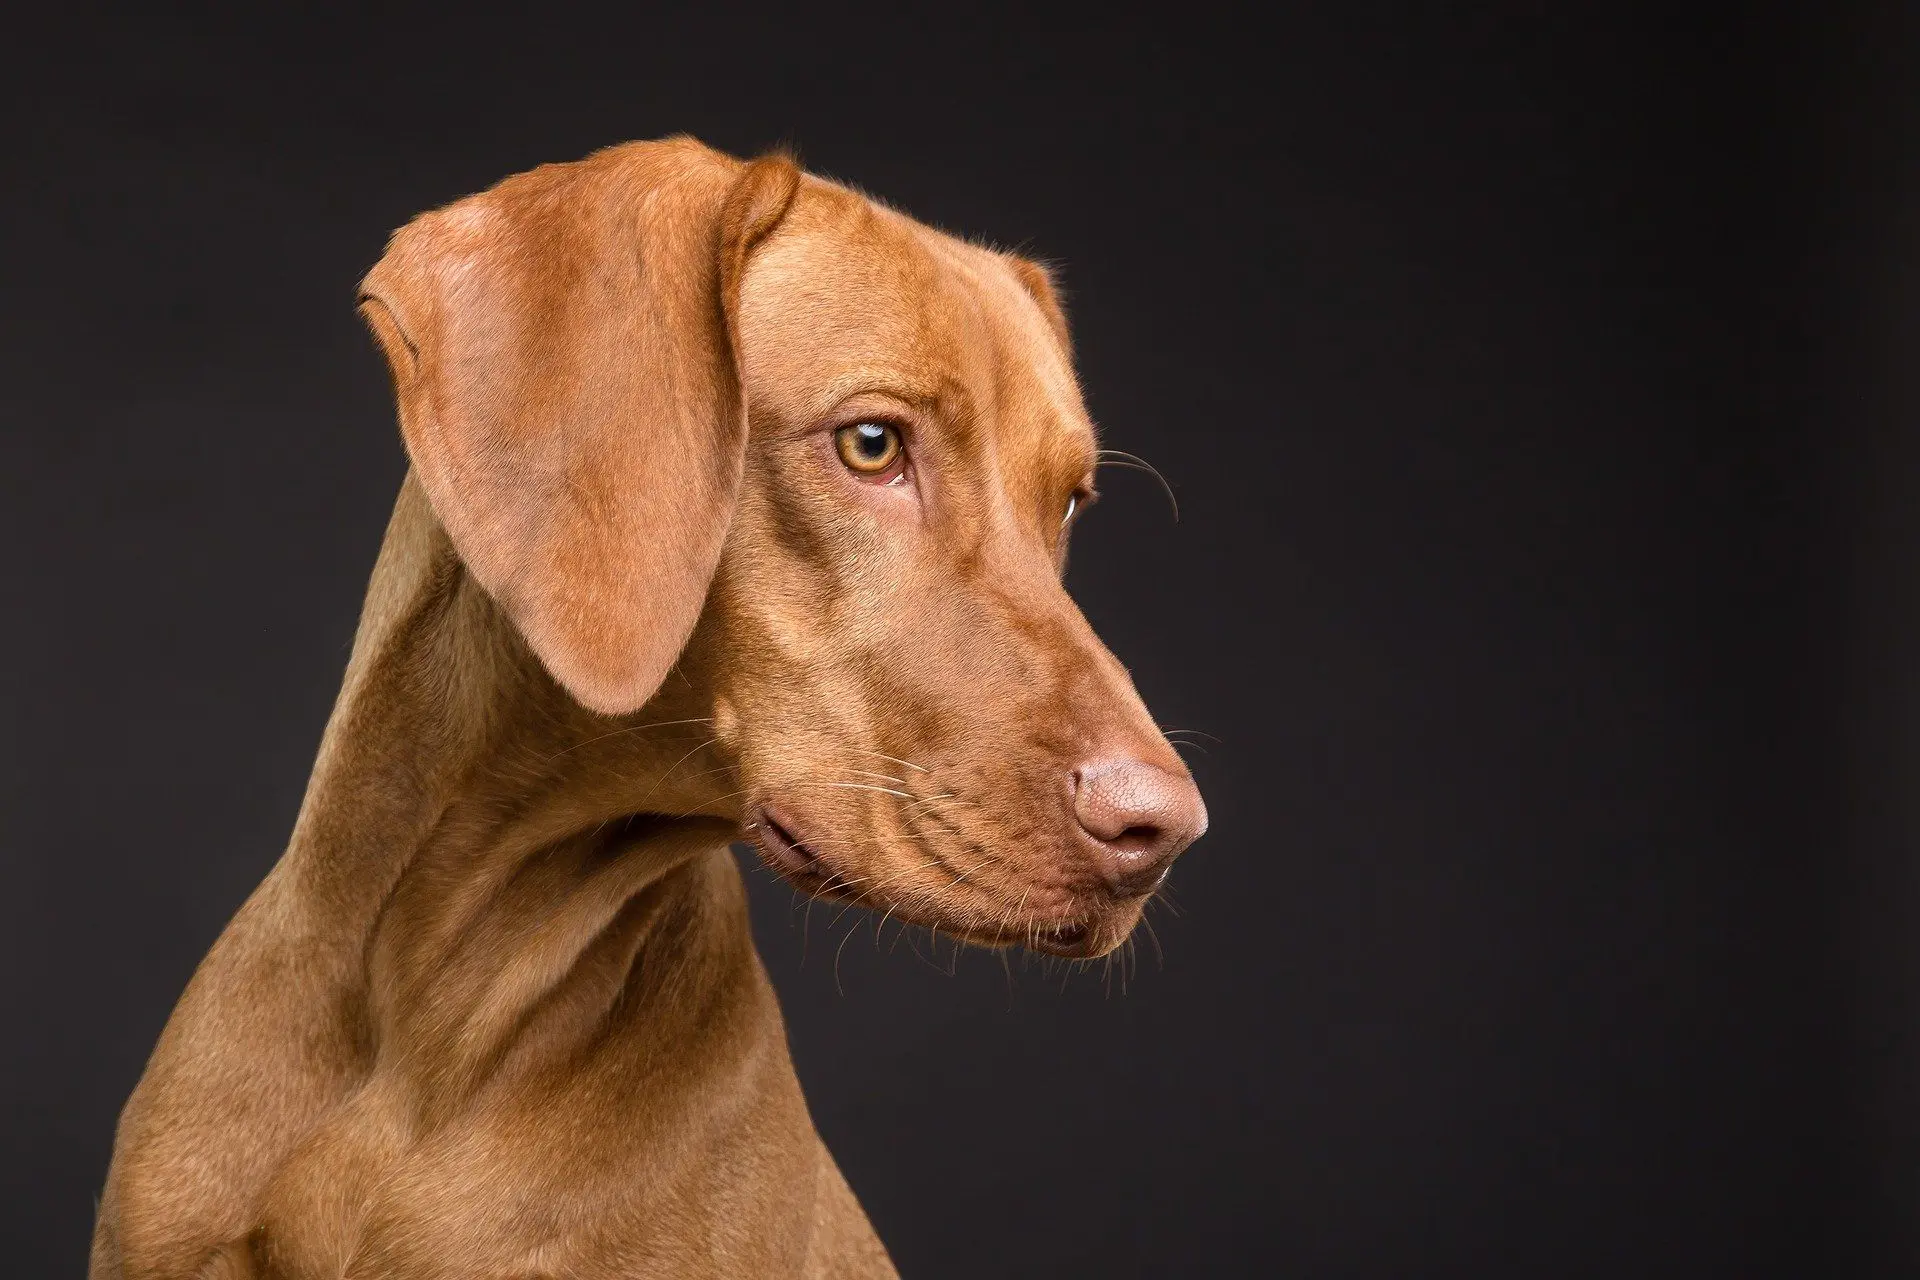
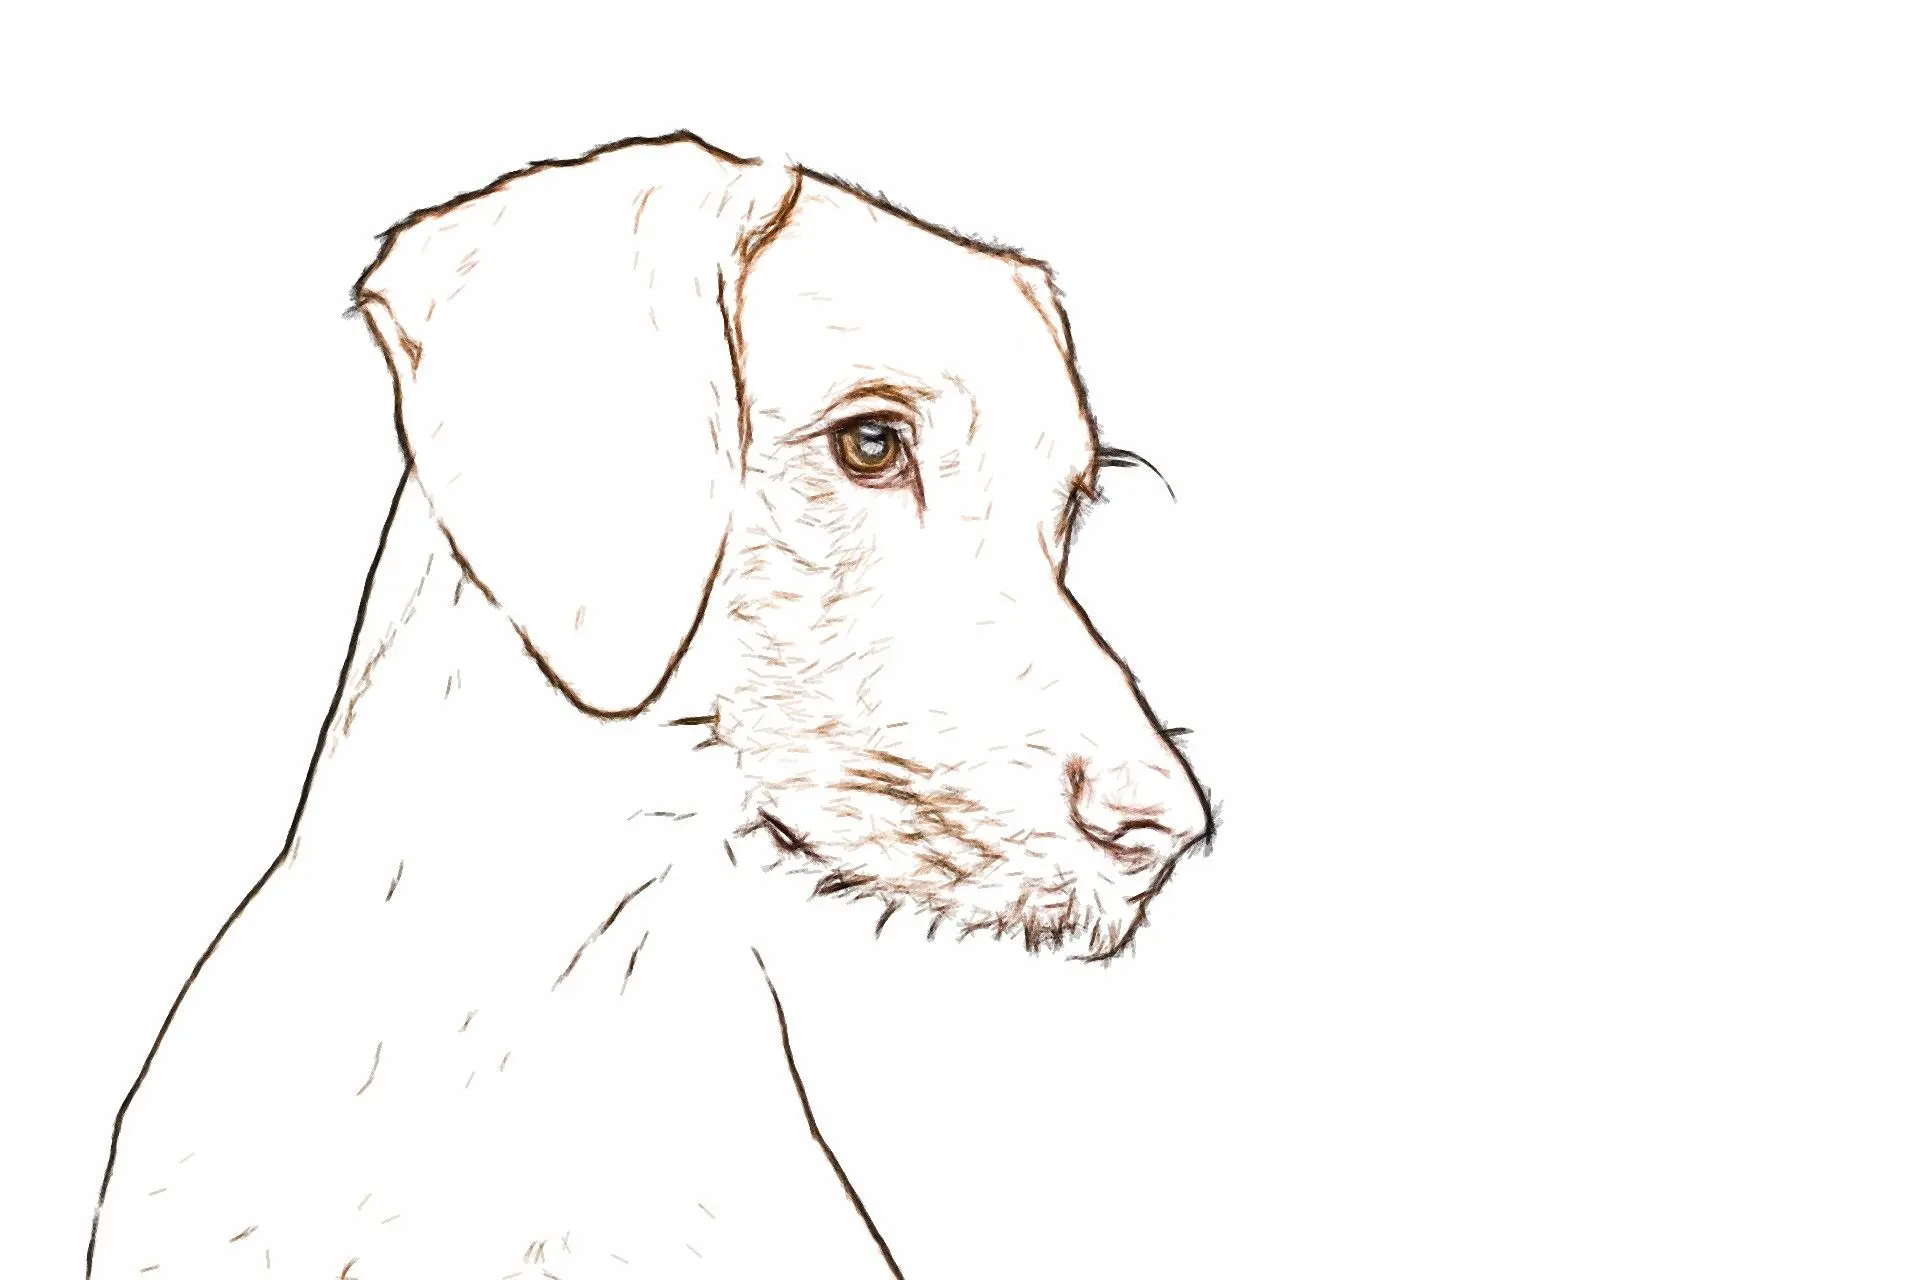
Let us learn to turn any photo into a realistic sketch within seconds.
Ho to use A.I. Photo to Pencil Sketch Converter Free Download
The program uses smart algorithms to help you create the perfect pencil sketch. With more than a dozen presets available, you will always find the one which works perfectly for your image.
In this section, we’ll review a few of the best ones!
1.
Light brown: As the name suggests,1. The Light Brown preset will give you a sketch that looks like it’s been made with an HB pencil. It works well for still life and simple nature photos since the light brown feels natural and rustic.
2.
High Contrast: High contrast effect will give you a black-and-white sketch with bold black lines and shading. If there are any white areas, this preset will give it a light grey shade, and dark areas will be completely black.
3. Expressive: One of the most colorful presets, Expressive creates a colored sketch with many small details and lines instead of general shading. It suits most photos since it closely matches a detailed pencil sketch without looking artificial.
4. Pen: The pen preset is useful for practicing your drawing skills. Since it mimics the look of a pen, the lines are thicker and easier to trace. It works well for simple photos with few details, as the focus goes to the strong outlines instead of the shading and hatching.
5. Schematic: With the highest contrast level, the Schematic preset creates a completely black-and-white sketch without shading. You can use this if you want a completely white background with only bold outlines.
6. Pop Art: Probably the preset that suits all types of images, Pop Art creates a colored sketch with very thin, fine lines. This effect resembles lightly-colored sketches made with pencil very accurately and does not look like something created by the software.
Sketch Drawer: additional options
The program offers complete control over the process, and you will be able to control the type of shading used, texture, intensity, and colors used.
Right below the Style and Preset options, you will see 3 other settings – Contour, Hatching and Colorize.
1.
Contour: Contour settings affect the outlines and details in the photo. If you click
Enable, you can adjust the Edge Strength, Smudging, Intensity, and Strokes. Moving the
Edge Strength slider to the right will increase the level of details, and moving it to the left will decrease it. Increasing the
Smudging will blend the lines with the background and give a paintbrush-type look. Adjusting the stroke settings will change the length and thickness of the lines used to create the drawing.
2. Hatching: Hatching refers to the crisscross pattern used for shading. Increasing the edge strength here increases the hatching in outlines while increasing curvature increases the hatching in detail areas. Midtone intensity affects the shading in parts that are neither very light nor very dark. You can even reverse the direction and look of the strokes using the dropdown options.
3. Colorize: You can enable Colorize to add color to a black and white sketch. There are two options under Colorize – Normalize Histogram and Color Shift. By clicking on Color Shift, you can choose which color will be used.